Getting started
You'll Need These Four Items.
Lay out and orient your four filters
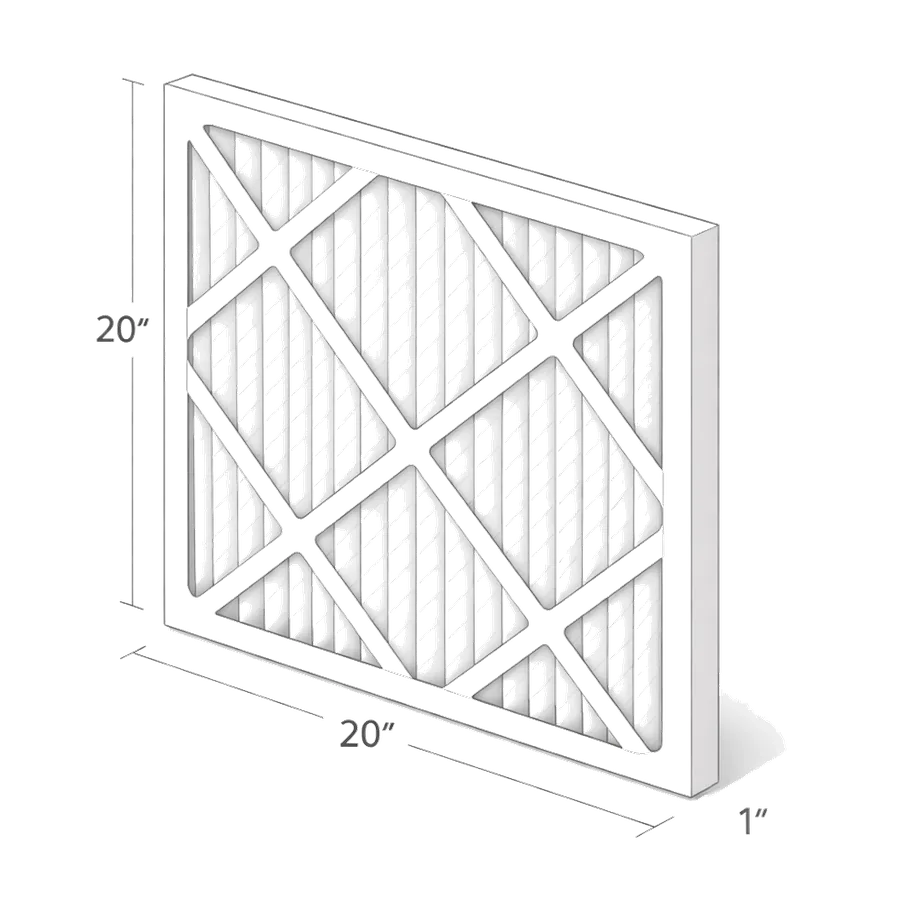
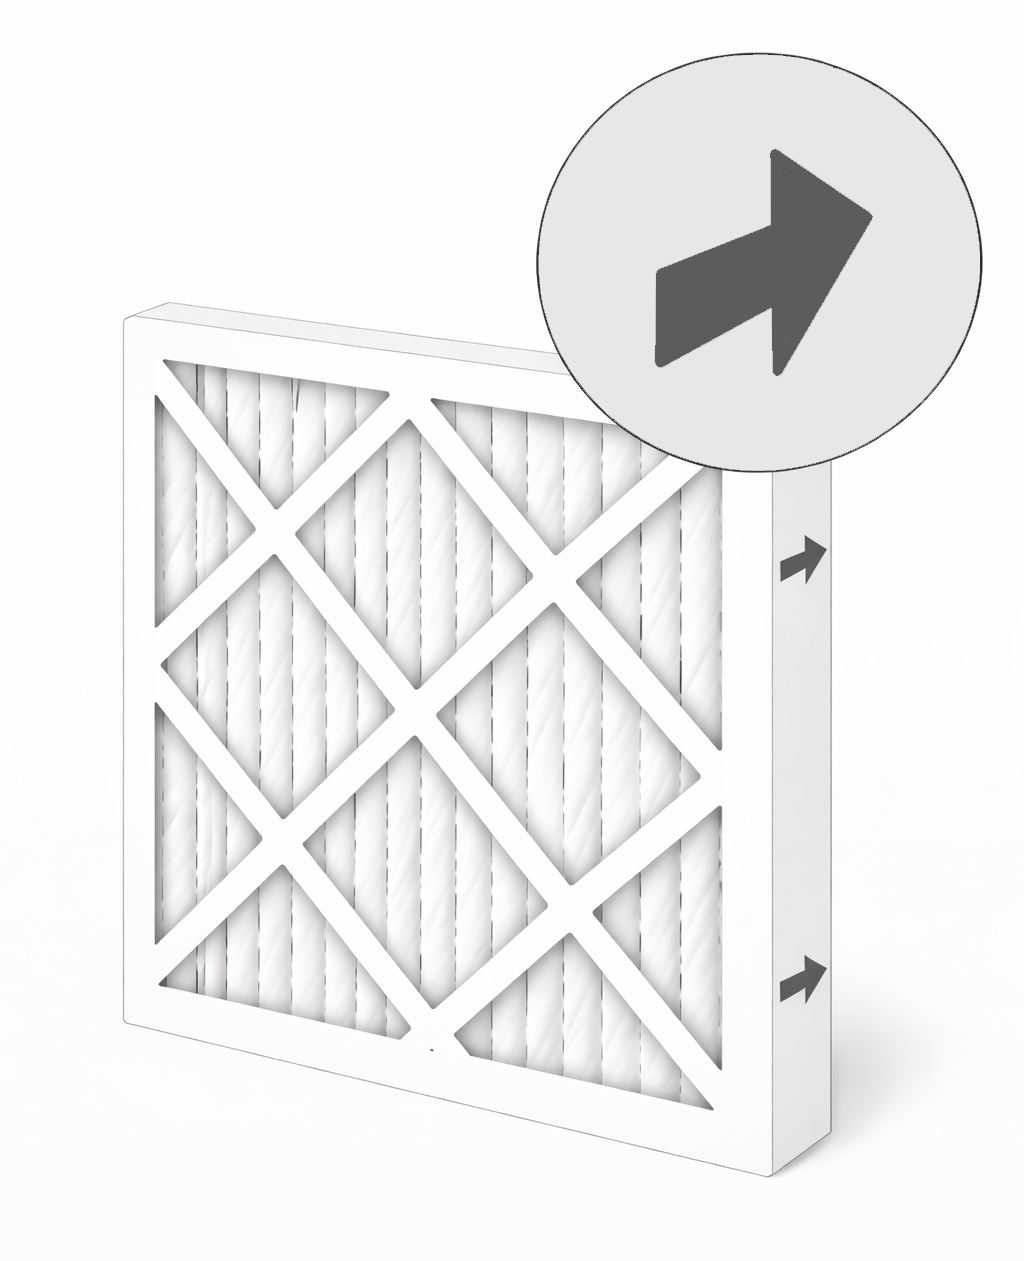
Unpack all four filters and lay them flat on the floor. Each filter has an airflow direction arrow printed on its cardboard frame — find it on each one. This arrow tells you which direction air is meant to flow through the filter media.
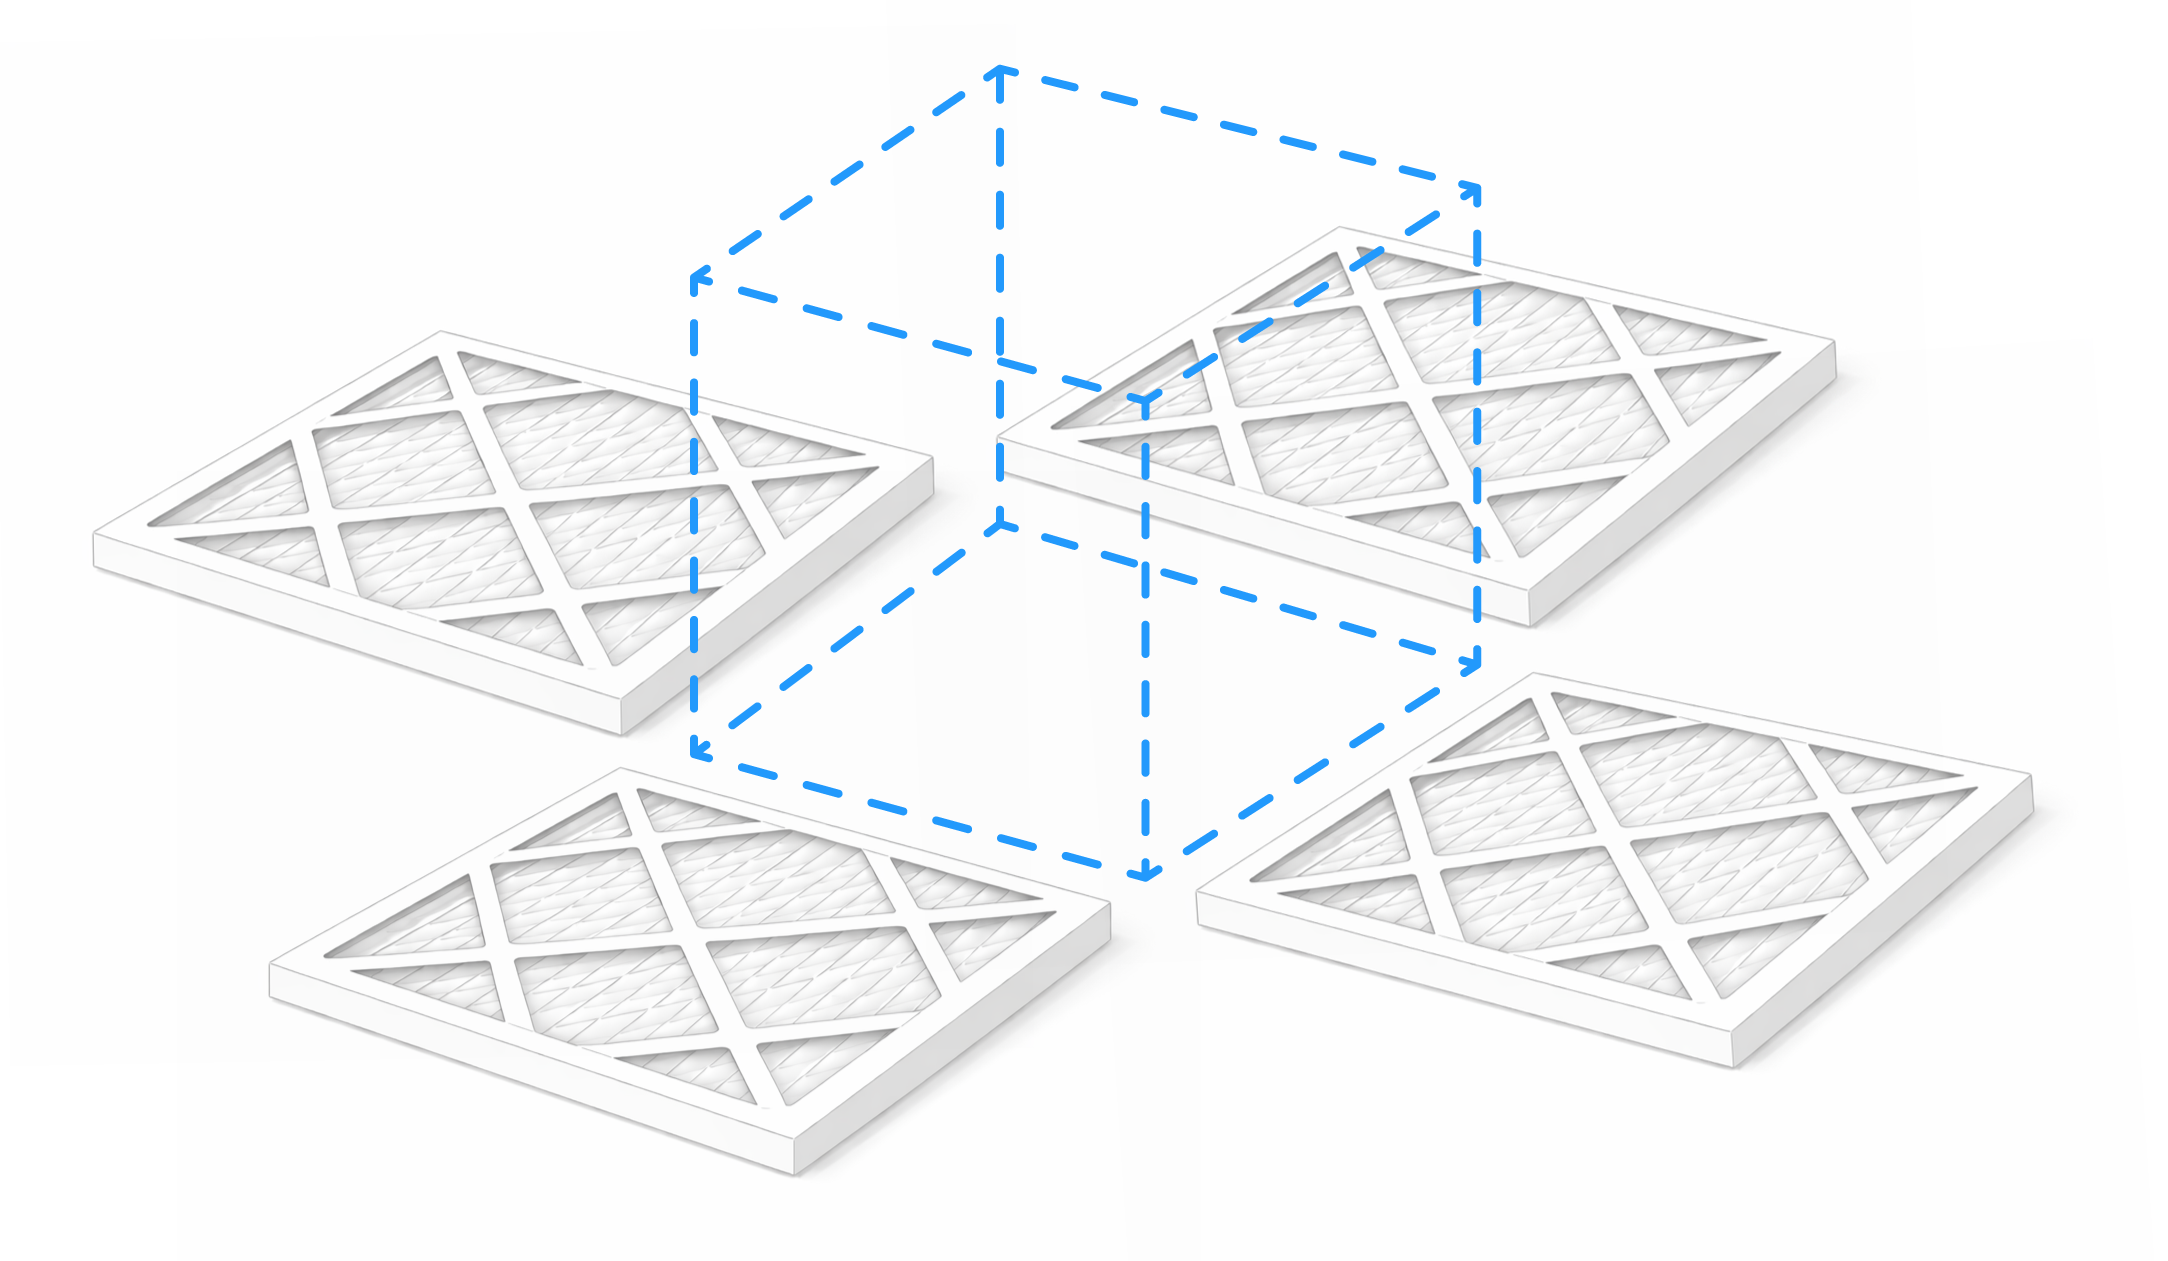
When you assemble the cube, you want every filter's airflow arrow pointing inward, toward the inside of the cube. Air will be drawn in through the filter media from the outside, pulled inward by the fan, and expelled upward through the fan. Getting this direction right is critical — reversed filters will still catch some particles but at reduced efficiency.
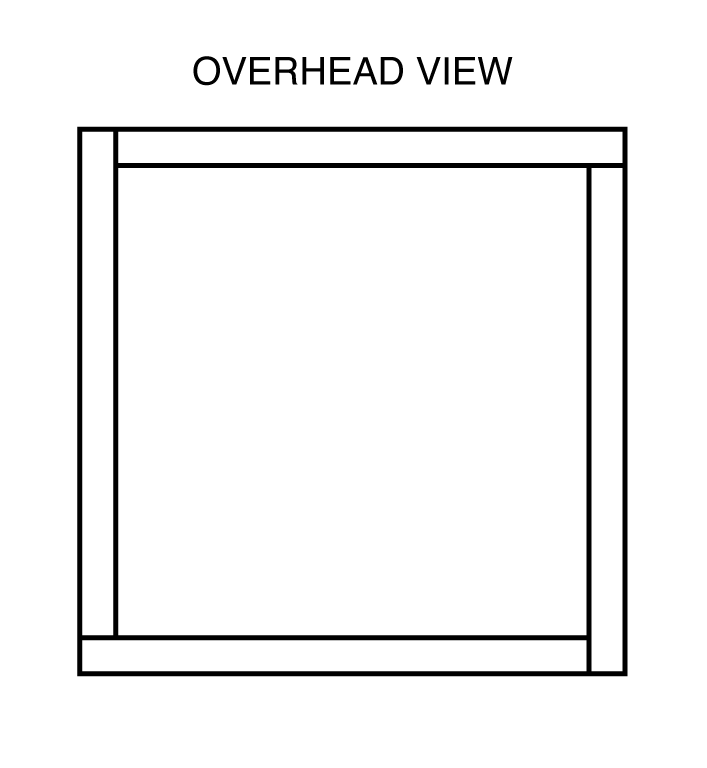
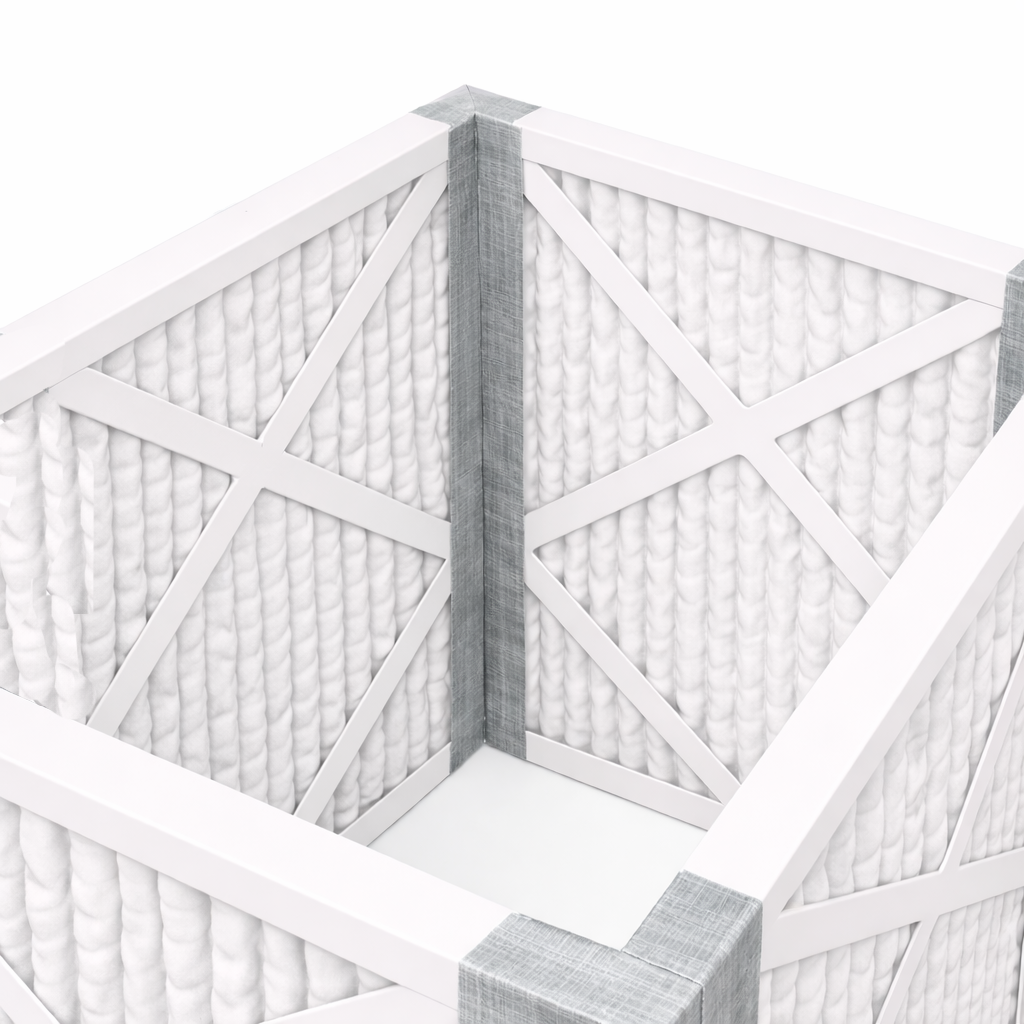
When joining the four filters into a square, use a staggered overlap pattern at each corner — the same way bricklayers offset each course so no two seams line up. Rotate through the four filters so that at each corner, one filter's edge overlaps the face of its neighbor. Done correctly, all four outer faces will be perfectly flush and coplanar, while each corner joint is reinforced by overlapping cardboard frames rather than two raw edges simply butting up against each other. This makes the cube significantly more rigid and gives the duct tape a wider, more stable surface to bond to.
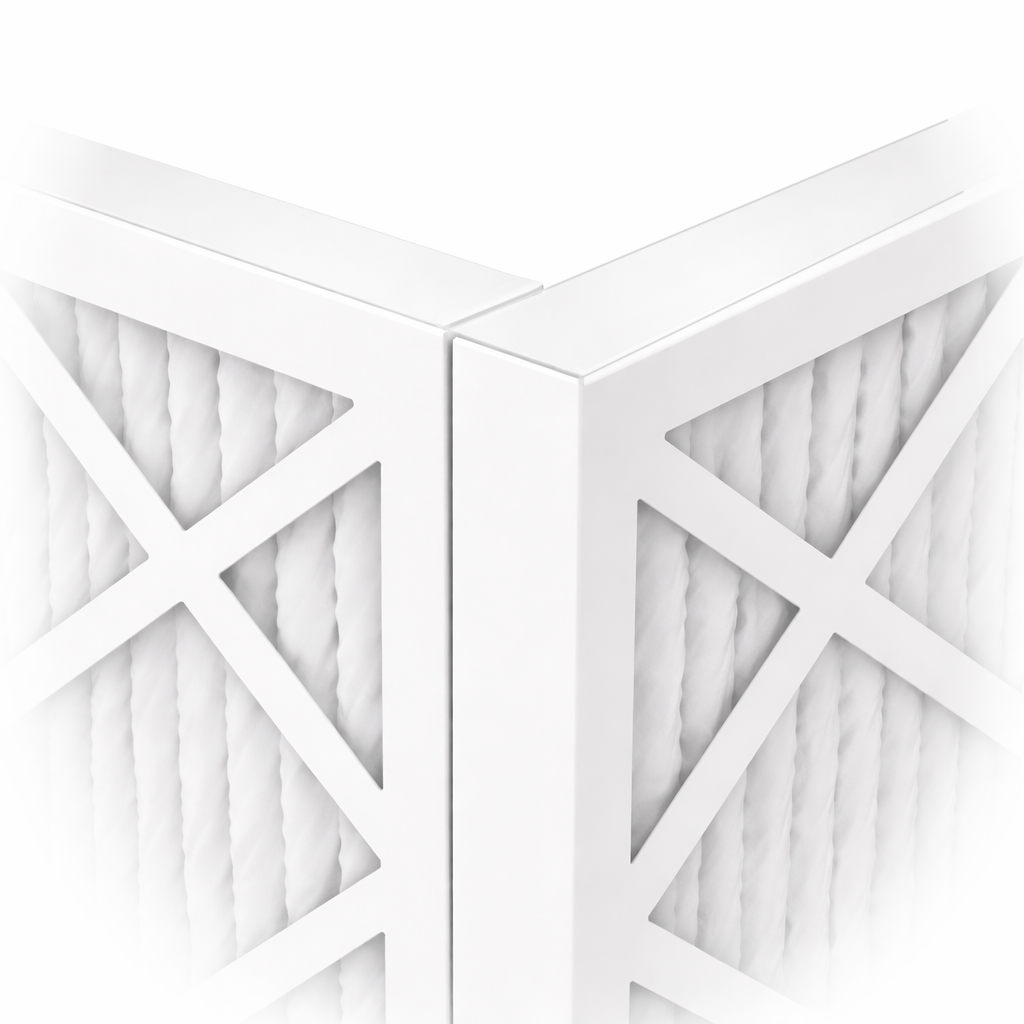
Done correctly, all four outer faces will be perfectly flush and coplanar, while each corner joint is reinforced by overlapping cardboard frames rather than two raw edges simply butting up against each other. This makes the cube significantly more rigid and gives the duct tape a wider, more stable surface to bond to.
Before taping anything, hold all four filters up and double-check that the arrows point inward when arranged in a square. It's much easier to fix now than after taping.
Tape the four filters into a cube
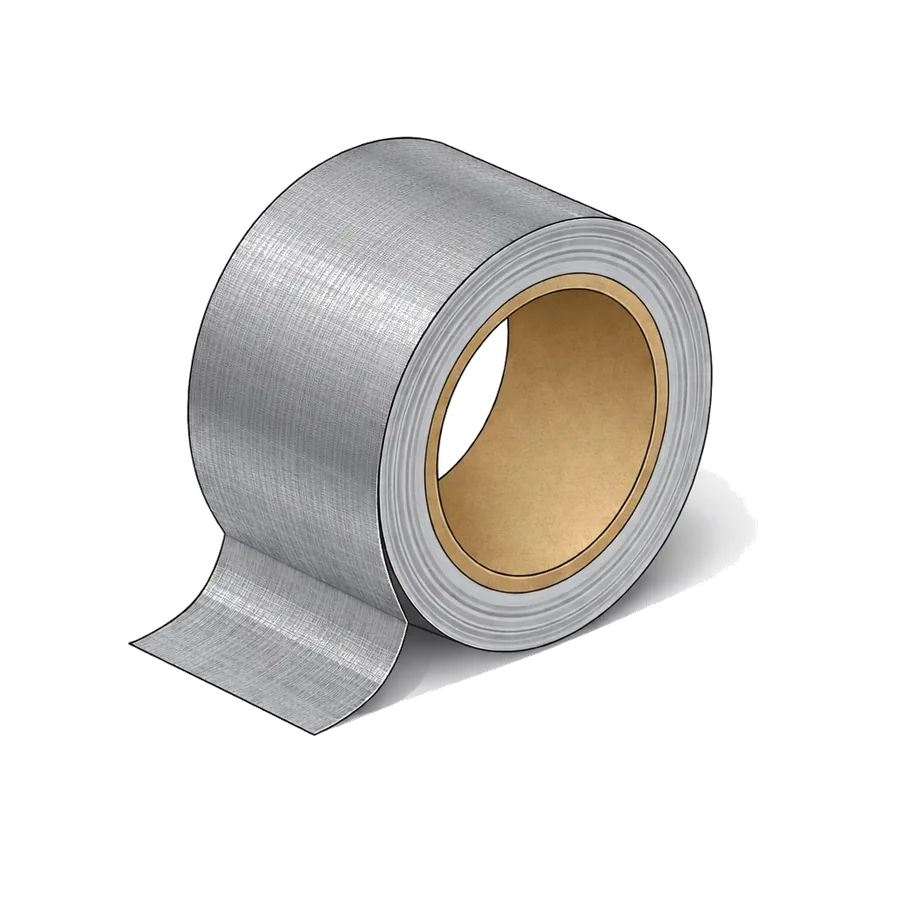
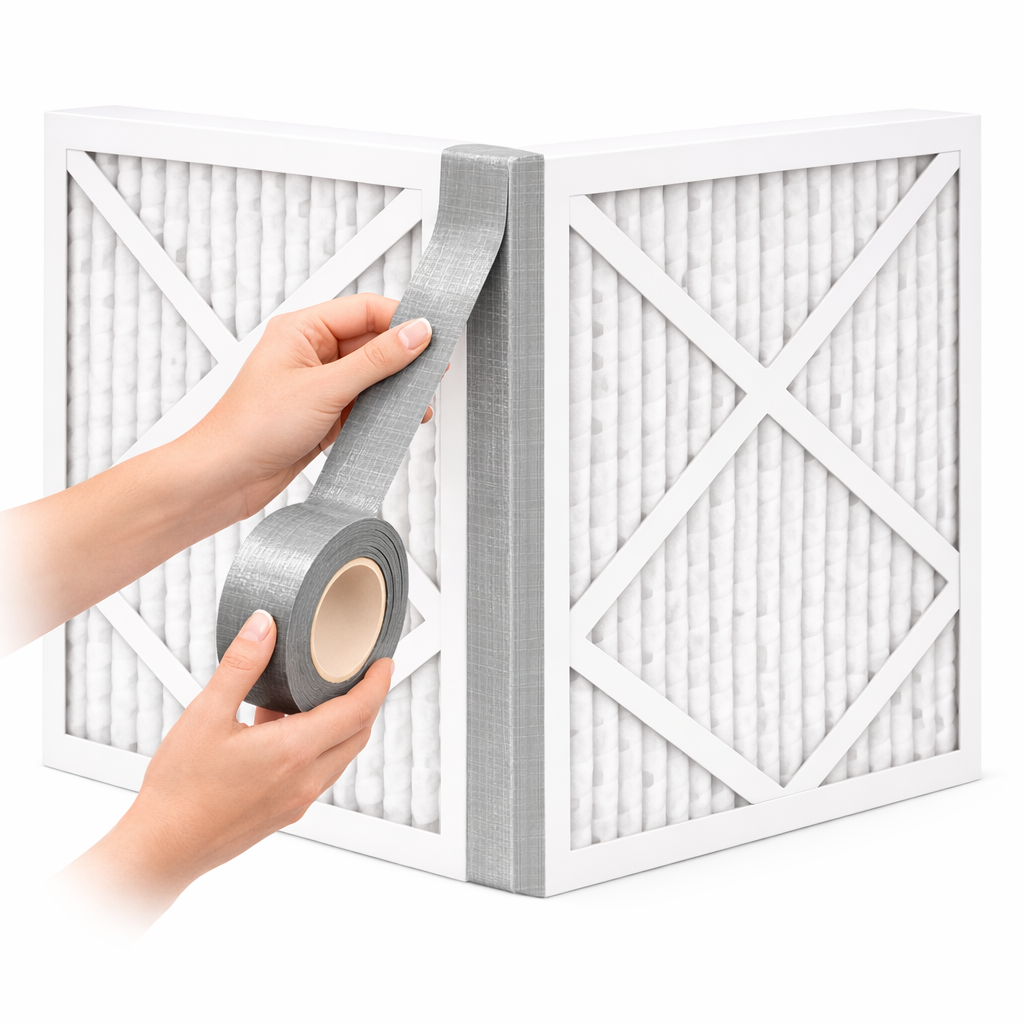
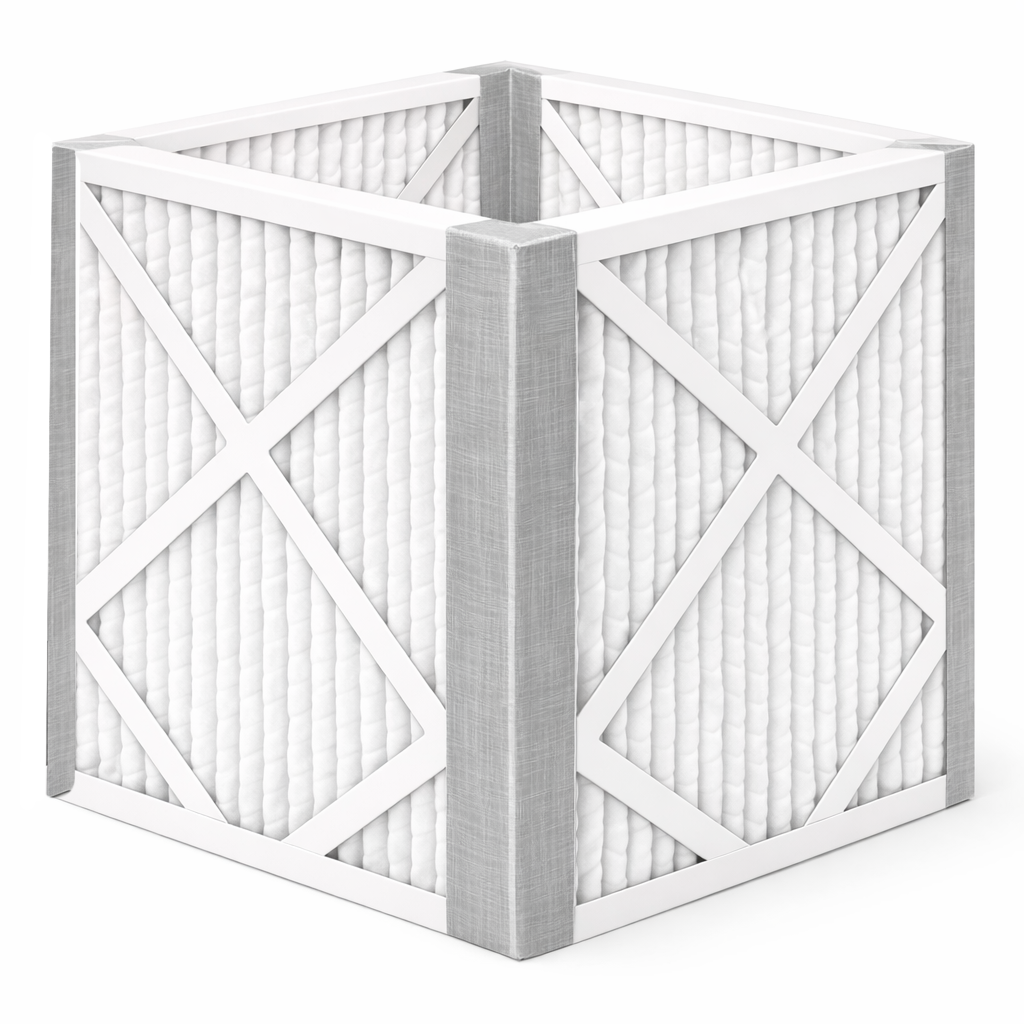
Stand two filters upright, edge to edge, and tape the seam with a full-length strip of duct tape. Run the tape along the entire height of the seam — about 20 inches. Add a second strip on the inside of the seam for a double seal.
Add the third and fourth filters the same way, forming an open square/cube with two open faces: one on top (where the fan will go) and one on the bottom (where the cardboard will go).
- Run tape the full length of every vertical seam, inside and out.
- Avoid taping over the filter media itself — only tape the cardboard frames at the edges.
- Press the tape firmly into each seam so there are no bubbles or lift points.
Avoid gaps at the corners. The corners where three edges meet are the most common leak points. Run an extra diagonal strip of tape across each outside corner.
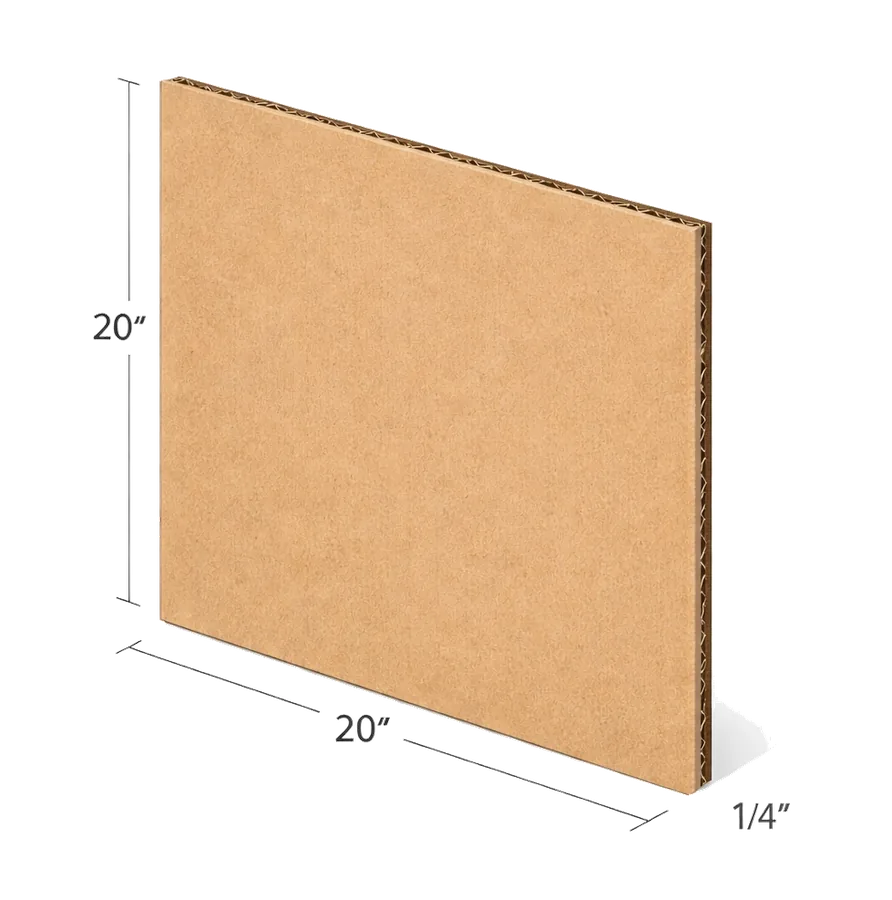
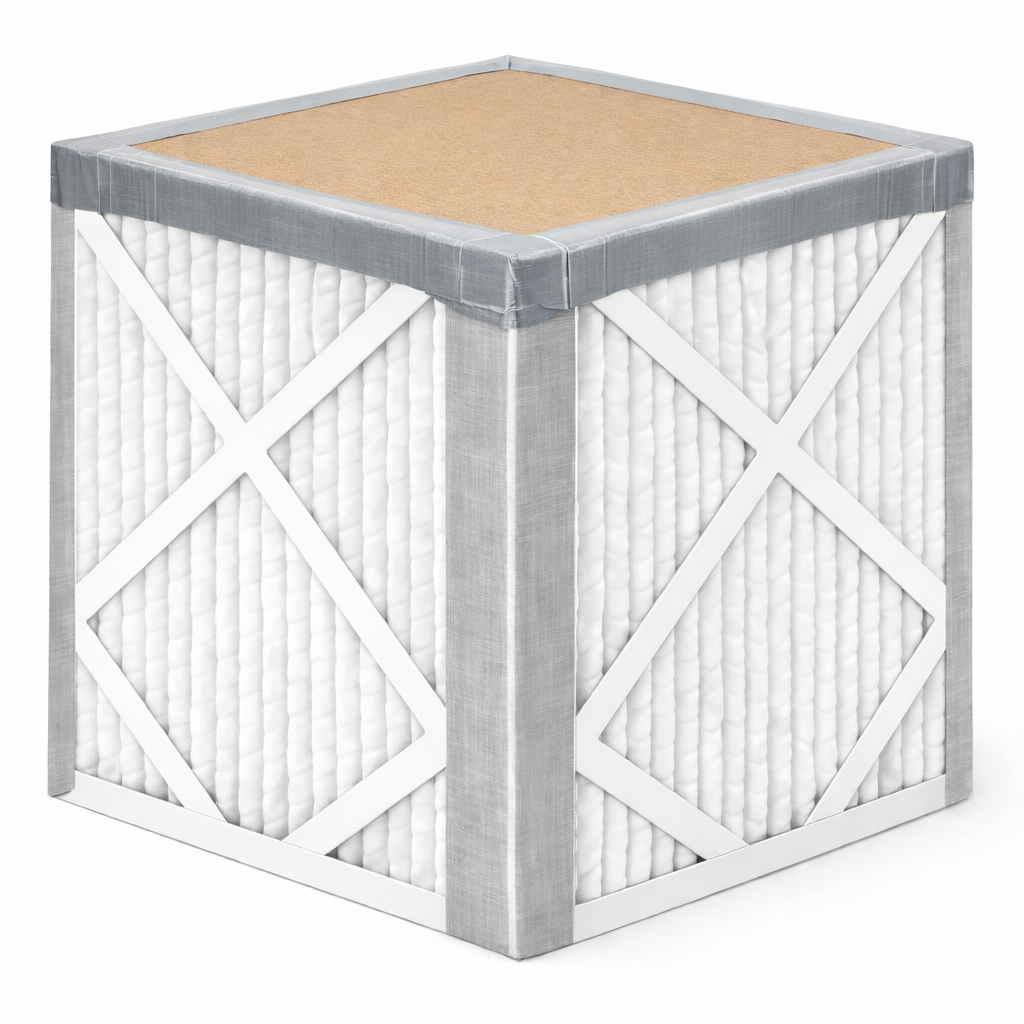
Seal the bottom with cardboard
Cut your piece of cardboard to exactly 20"×20" (or the outer dimensions of your cube's bottom opening). The fit should be snug. Tape it firmly to the bottom of the filter cube on all four edges, sealing the seam completely.
The bottom cardboard doesn't let air in — it forces all air intake to come through the four filter sides. Any gap you leave at the bottom is unfiltered air bypassing the filters entirely.
Optional upgrade: Instead of cardboard, use a fifth MERV-13 filter on the bottom and raise the cube on a small platform (like a couple of books). This adds a fifth filter surface and can extend filter life by spreading out the dust load.
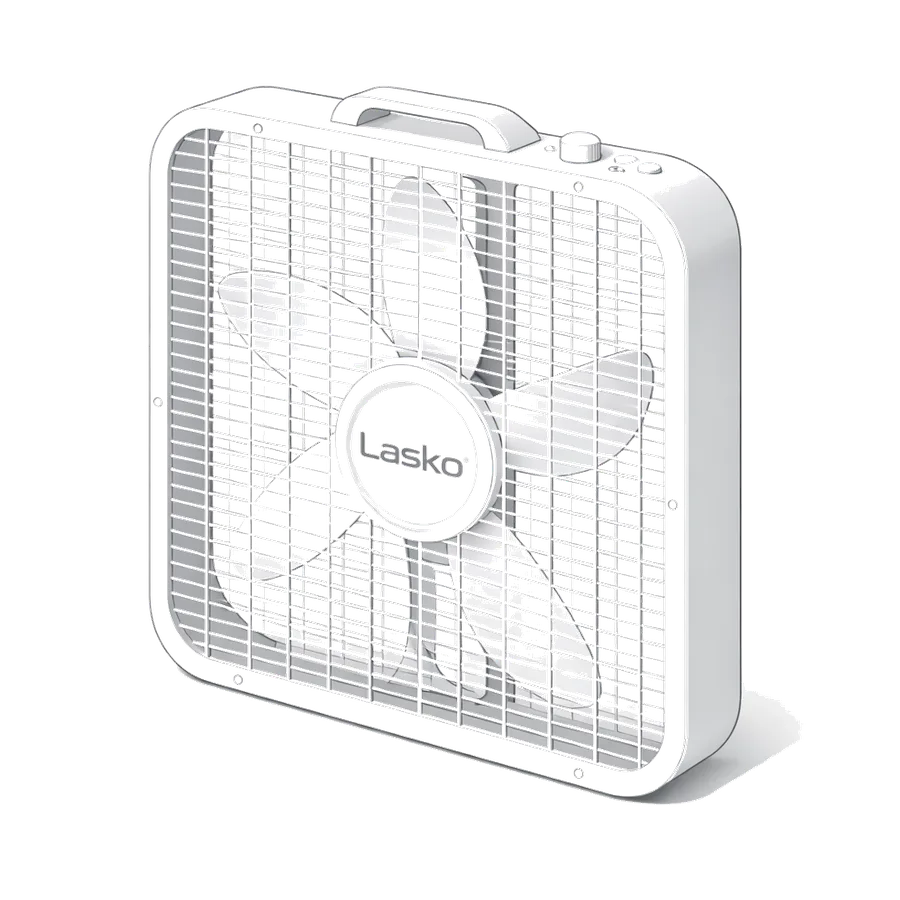
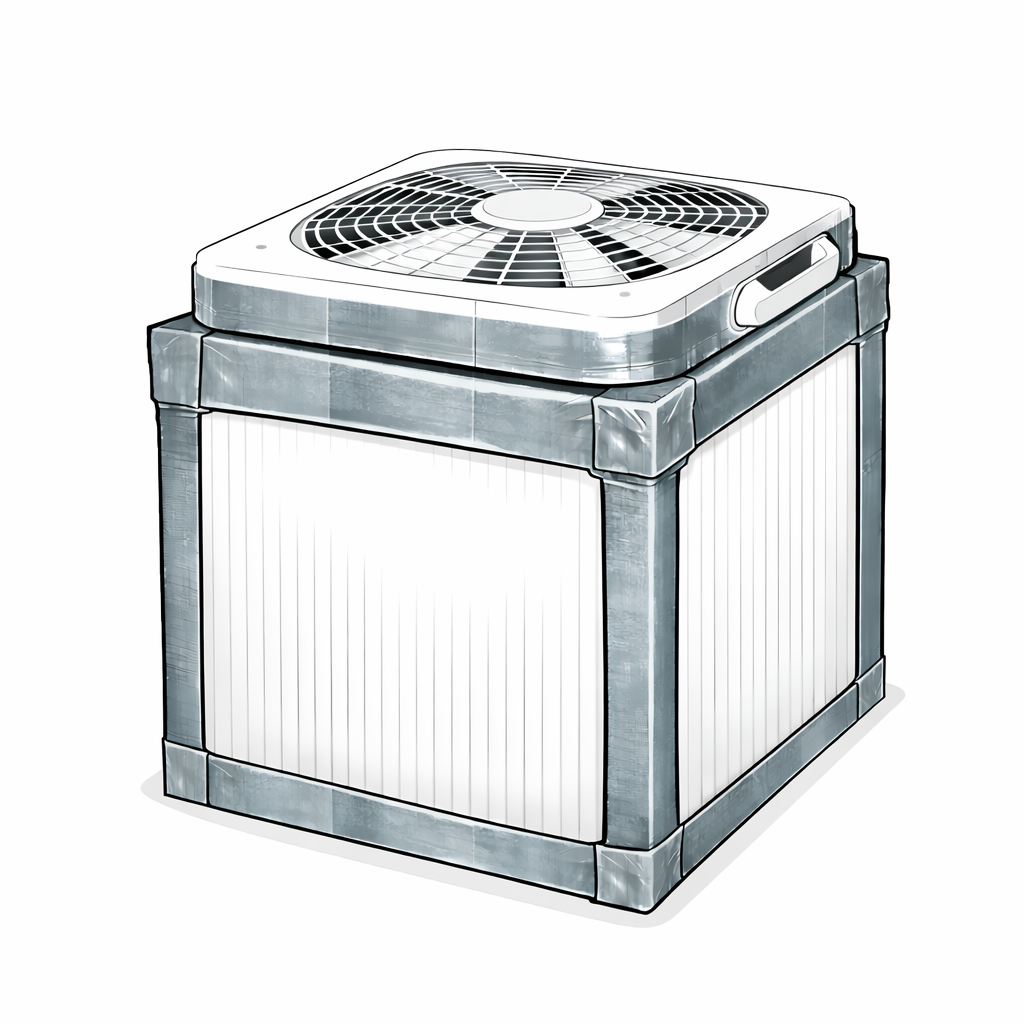
Mount the box fan on top
Place the box fan on top of the cube opening, fan-side up — so that the fan blows air out of the cube (not into it). The fan pulls air in through the filters and pushes it up and out into the room.
Tape around all four edges where the fan frame meets the top of the filter cube. The seal here is important — any gap means the fan is pulling some air from the room directly rather than through the filters.
- Fan blows air upward — out of the cube, not into it.
- Tape all four edges of the fan frame to the top of the filter cube.
- Leave the fan power cord accessible — it runs over the edge of a filter.
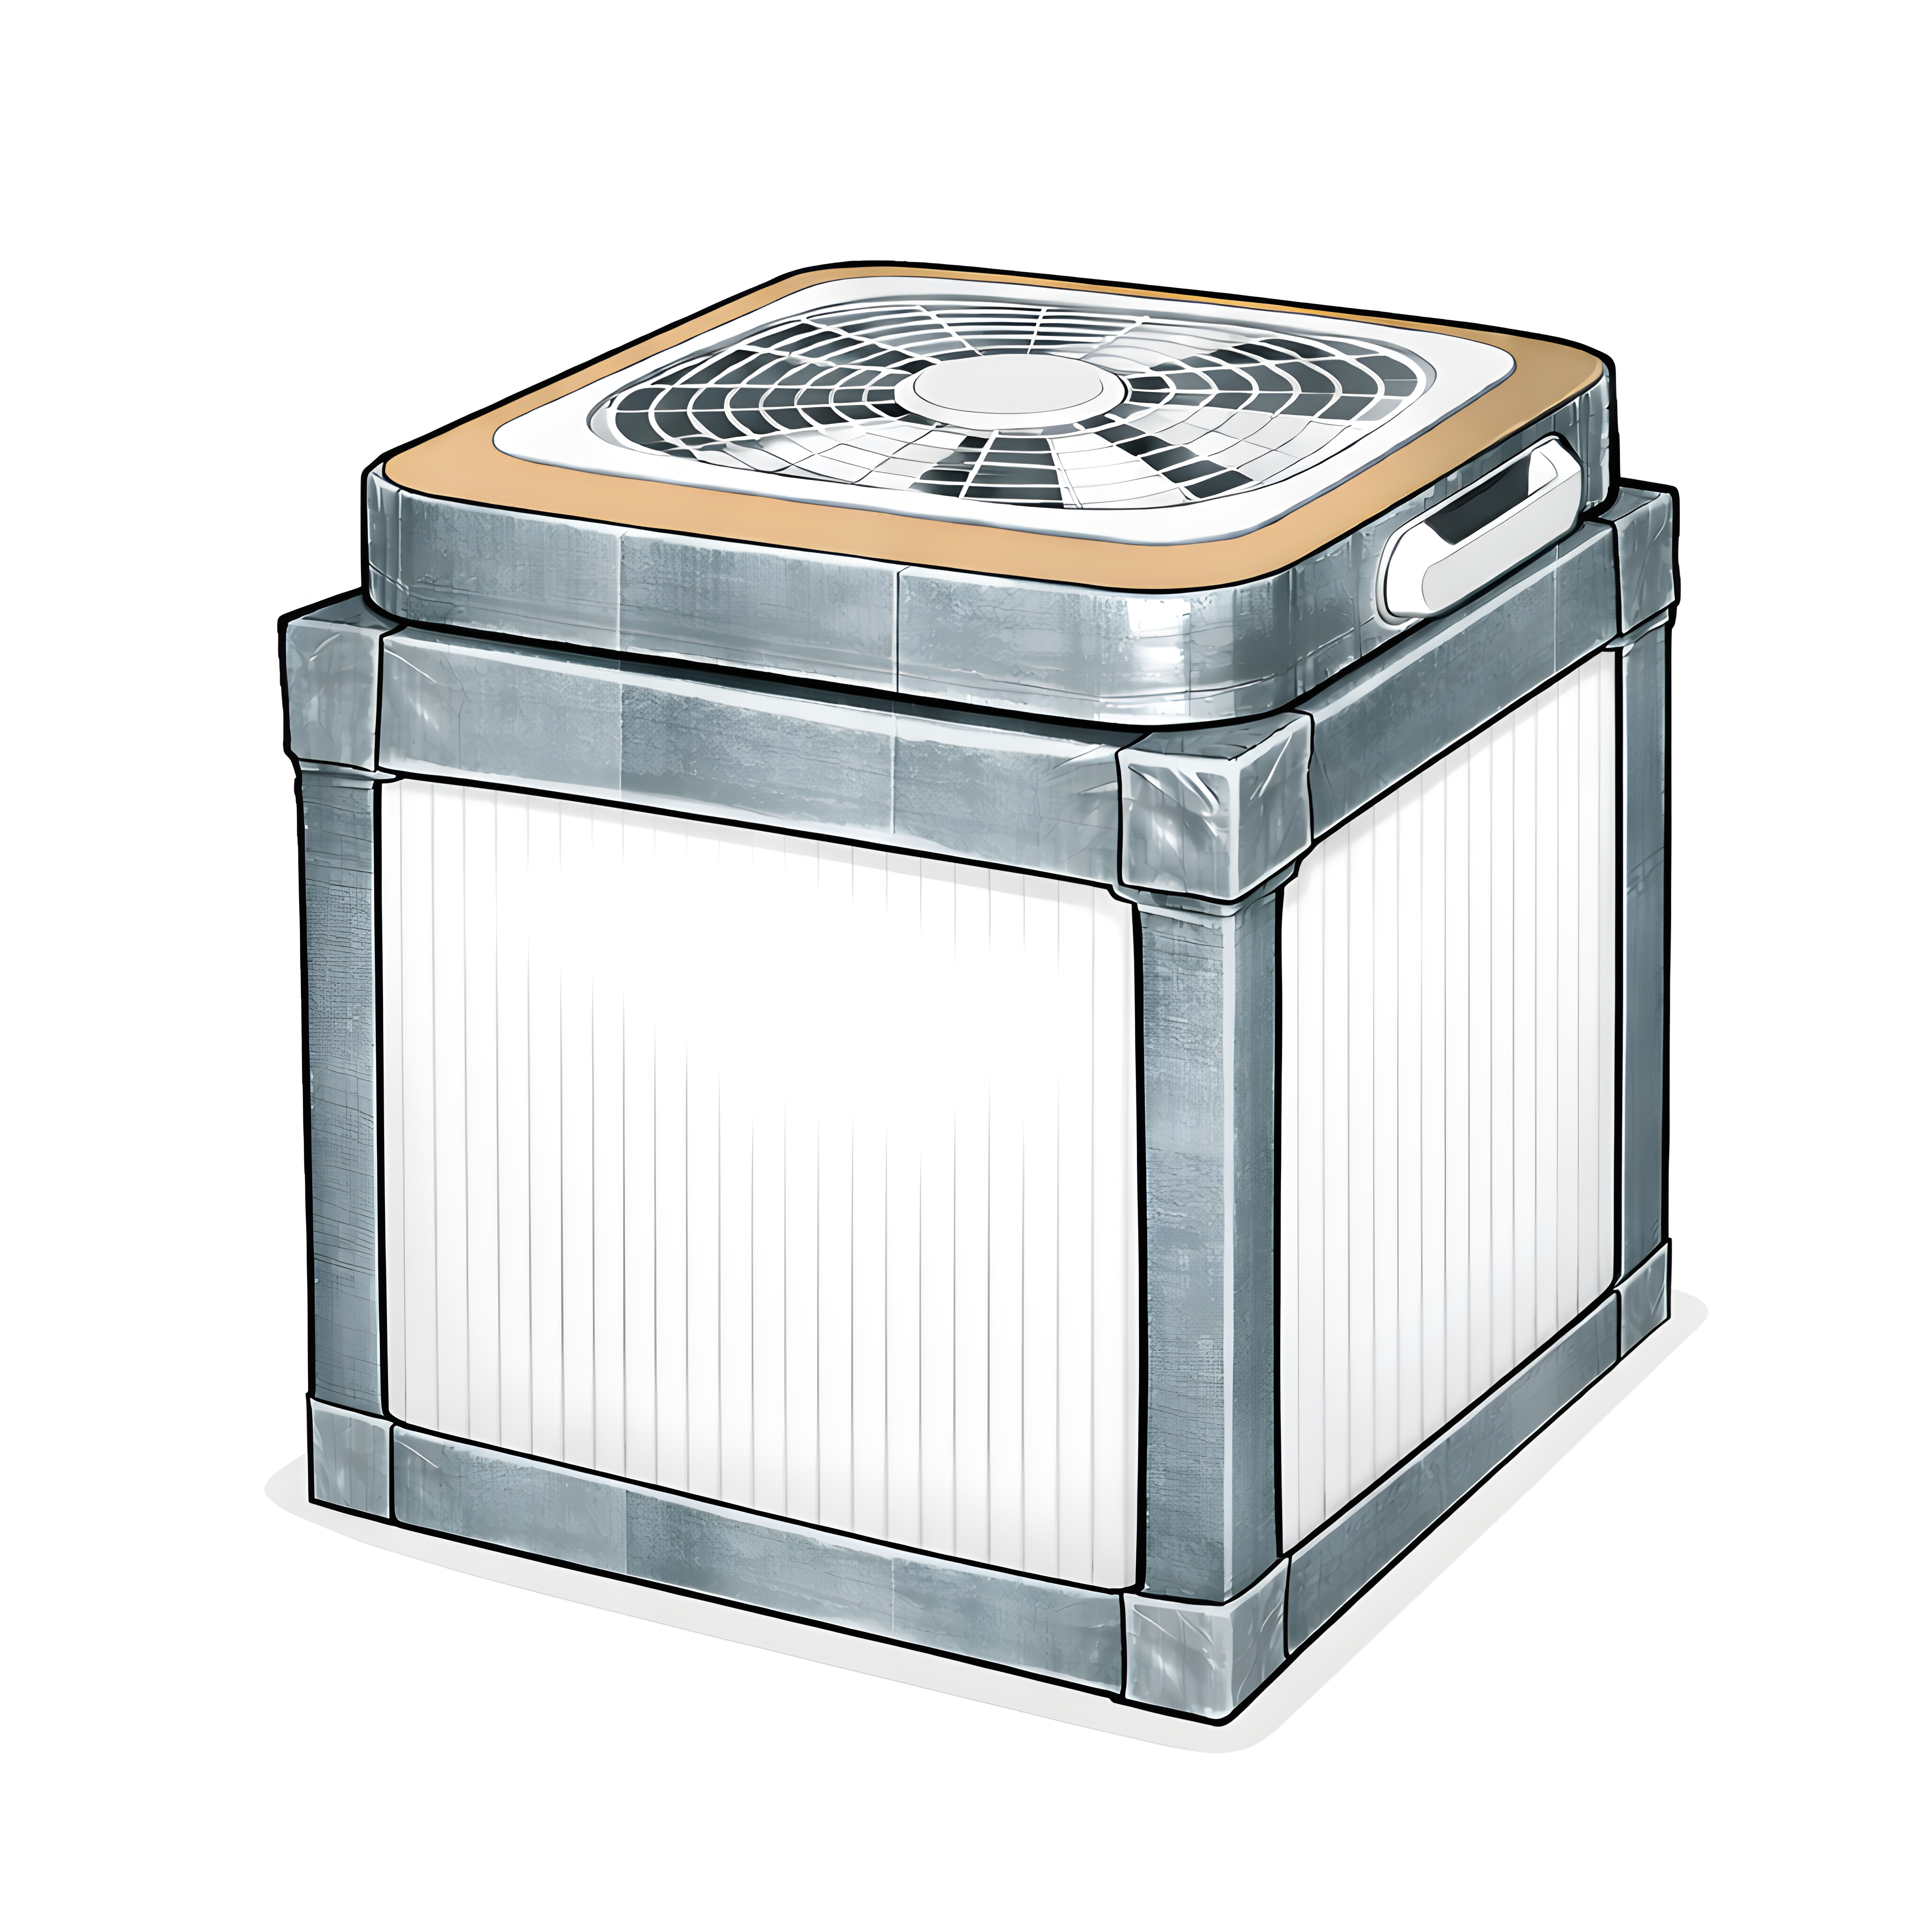
Cut and attach the fan shroud
A fan shroud is a cardboard piece that covers the flat area between the fan's outer frame and the spinning blade circle. Without a shroud, the fan can pull air from the inside edge of the frame — bypassing the filters. Adding a shroud has been shown to boost performance by up to 47%.
To make one: trace the outside of your fan on a piece of cardboard, then cut out a circular hole in the center that exposes only the fan blades. Tape the shroud on top of the fan.
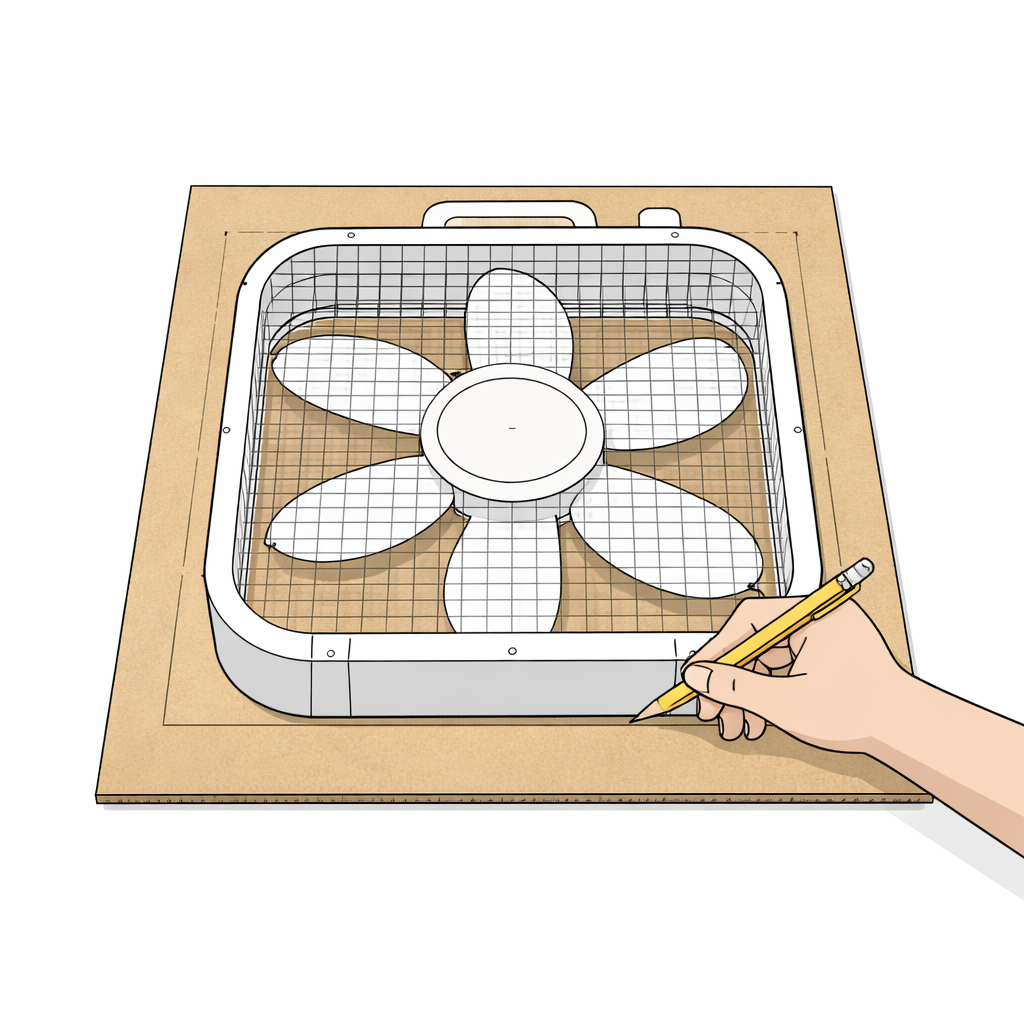
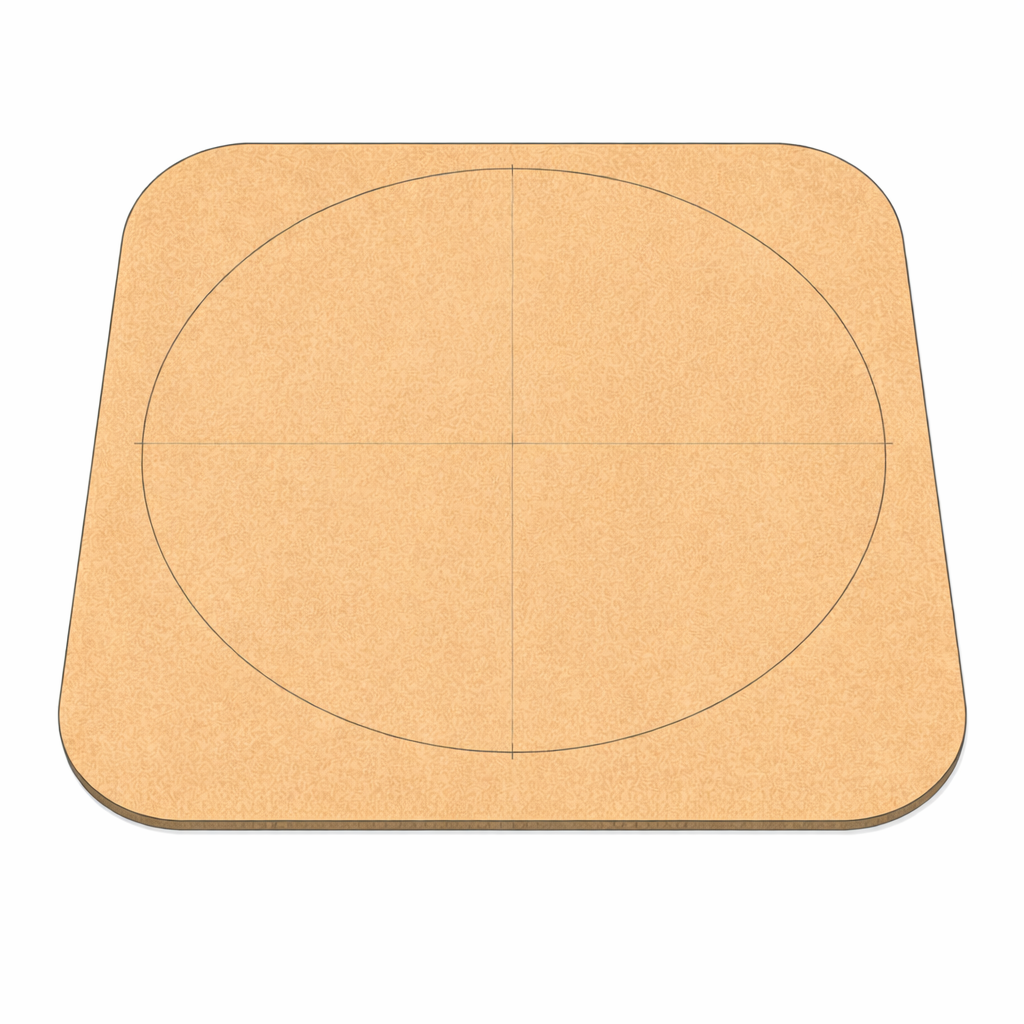
- For Lasko fans: cut the circular opening to 15" internal diameter.
- For Utilitech fans: cut the circular opening to 13.5" internal diameter.
- For other brands: cut to match the outer diameter of the fan blade cage.
For a more durable shroud, use Coroplast (corrugated plastic sheet) or 1/4" plywood instead of cardboard. These hold their shape better over time and in humid conditions.
Test for leaks and seal any gaps
Turn the fan on to medium speed and run your palm slowly along every seam — the four vertical filter edges, the bottom cardboard, and the fan perimeter. Any air movement you feel on your palm is unfiltered air leaking through a gap.
Mark any leaks with a pen and turn the fan off before taping. Apply additional tape over every gap you found, then test again. A well-sealed box should have no detectable airflow except through the filter faces and out the top fan grille.
- Check all four vertical corner seams.
- Check the bottom cardboard edges.
- Check the fan-to-filter perimeter.
- Check the fan shroud edges if installed.
Your unit is ready. Place it in the room with the most occupants, or anywhere you want cleaner air. On medium speed, most standard rooms see a full air change every 12–20 minutes.
Design variations
Different builds for different needs.
4-Filter Cube (this guide)
Four filters taped into a cube with a cardboard bottom and a fan on top. The easiest build, most common design, and best balance of cost, size, and performance for most homes.
5-Filter Cube
Replace the cardboard bottom with a fifth MERV-13 filter, and raise the cube slightly off the floor to allow air through the bottom. Reduces strain on the fan motor and distributes dust load across more filter surface area.
2-Filter "Wedge"
A smaller, angled design using just two filters. Costs less and has a smaller footprint — good for desks or small rooms. Less total filter area than the cube, but still significantly better than nothing.
Single Filter (Classic)
Duct tape one filter directly to the back of a box fan. The simplest and cheapest option, but puts more strain on the fan motor and requires more frequent filter changes. Best as a temporary measure.
Choosing filters
MERV-13 is the sweet spot. Here's why.
MERV (Minimum Efficiency Reporting Value) ratings tell you how small a particle a filter can capture. Higher ratings capture smaller particles — but also create more air resistance, which can strain the fan motor.
MERV-13 is the recommended grade because it captures particles down to 0.3 microns (including most viruses, fine dust, and smoke) while maintaining reasonable airflow. True HEPA (MERV-17) is too restrictive for a box fan at this scale.
Always buy from reputable brands at hardware stores. Some online vendors sell filters labeled MERV-13 that don't perform to that standard when independently tested.
See it in action
Watch a complete build from start to finish.
This walkthrough covers the full 4-filter cube assembly — filter orientation, taping technique, fan mounting, and the shroud. A good companion to the written steps above if you're more of a visual learner.
Total build time on camera is about 20 minutes. Real-world builds typically take 25–35 minutes the first time.

Ready to build yours?
Pick up four MERV-13 filters and a box fan at any hardware store. The whole build costs ~$40–60 and takes about 15 minutes.